Wednesday, 26 February 2014

A Challenge is Born

My wonderful long time friend Sue shared a bunch of beads with me a couple of months ago that she didn't really know what to do with. Some presented a challenge and some were, well... fugly.
Those that I didn't think I could really put to good use I asked her if I could share. 
When Nathalie came over the other day, we naturally migrated to the jewelry room. I gave her the box to go through and see if there was anything she could use.  She dug out some with glee and others with that look of hers and says, "What the heck would you do with these?"  She pulled out some of the fuglies.  We laughed and brainstormed and pretty much came up with a couple of old "mamere' ideas.  Being a couple of girls originally from la belle province that's our term for grandmother or old woman or more eloquently 'old biddy'.  We started to tickle our imagination a little further and actually started to get some half decent ideas and decided we needed to have a challenge.  There aren't too many rules.  We have one month to use the beads in any design we come up with that's not too matronly. That's it.  We started to get a little excited and hummed and hawed and all of a sudden there was no more sharing of ideas.  I have a few things that need to get finished before I can really play with them. I wouldn't have touched these things to be honest, but now that the gauntlet has been laid, I'm chomping at the bit to get started with them.  Sue doesn't know it yet, but we volunteered her to join this challenge since she was the one that started it all to begin with.


The Fuglies


Beady Friends and Their Lessons

Yesterday my friend Nathalie came over for a visit.  It's always great to see her and we always have a good time, especially if we end up in the jewelry room.  We teach each other things or just explore or snoop through my stash for inspiration.  However yesterday was special because I hadn't seen her since December and she came bearing a gift, a beady gift! A gift packed with meaning and love.

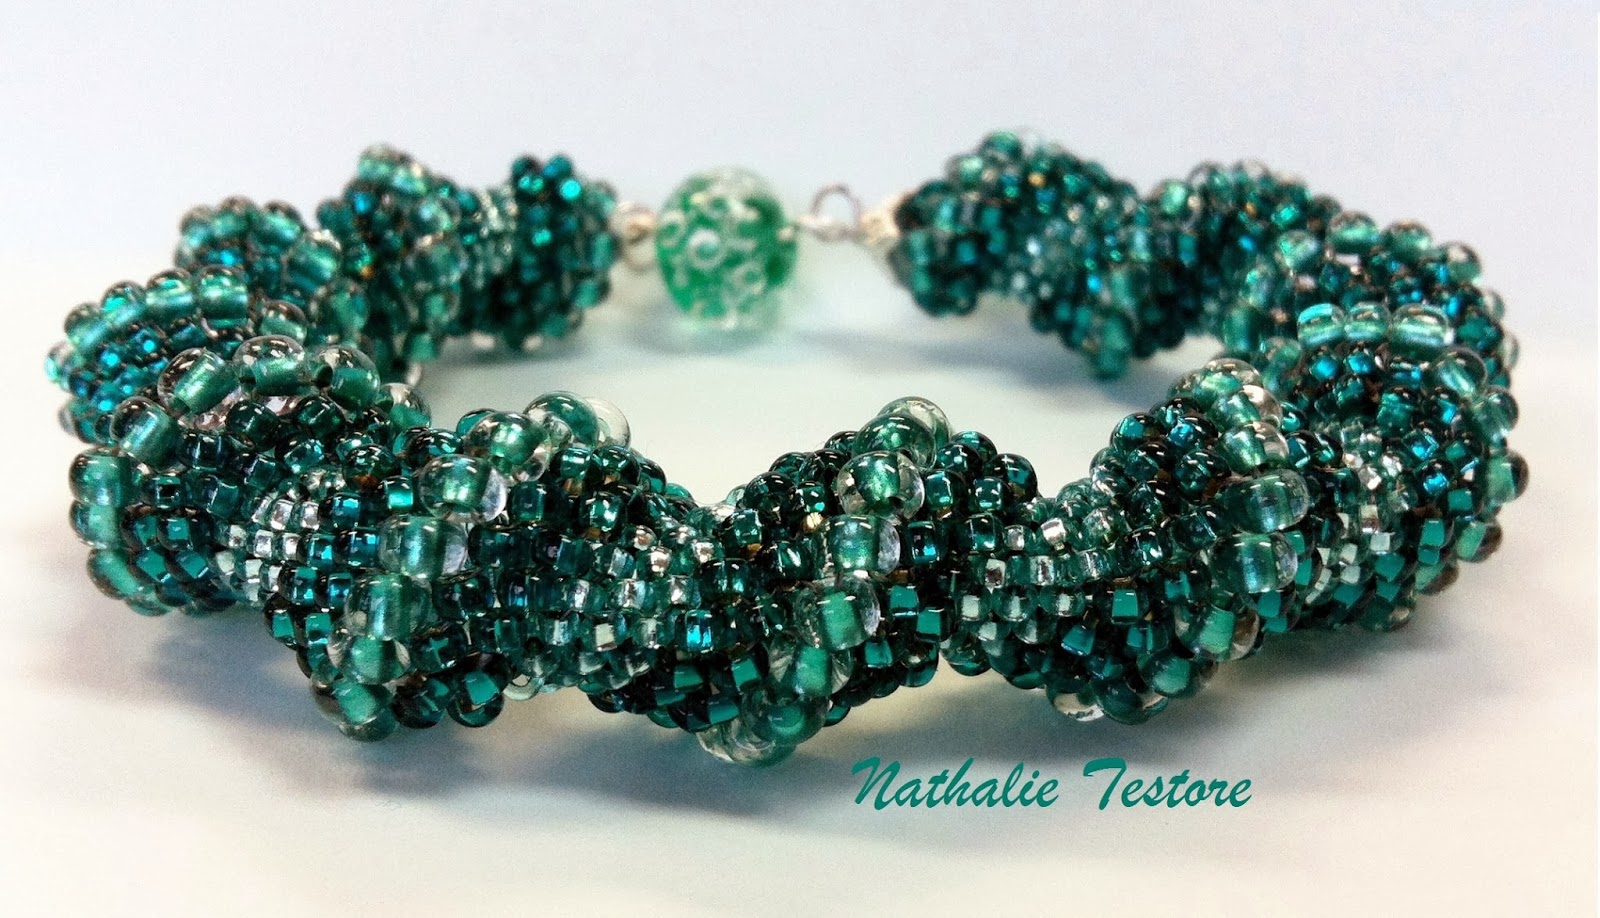
Let me give you some background before I show it off. It was nearing the end of summer when I casually asked Nathalie if she knew how or could figure out how to do a Cellini Spiral bracelet for me. Nathalie's fairly new to this art form and if I'd known the task was going to be that challenging I would never have asked.  But asked I did and she tried, and it didn't work for her.  She started and pulled it apart multiple times. She'd put it away for awhile when it got too testy.  Then a move and a new job took over for awhile, but still, the Cellini was never far from her mind and she'd take it back out and try and figure it out.  We scoured the net for a better tutorial and she asked some of "the masters" for help and it just didn't want to work for her. I felt terrible for asking her.  I offered to buy her a tutorial in hopes it would present it in a different way that would click. I offered a class at our local beady hangout but she was determined to figure it out on her own.
Well one night a few short weeks ago she had her Eureka moment and I received a middle of the night message.  Four little words, that was all  "I beat the beast!!!" 
It only took 7 months, a big move, a career change, lots of life surprises sprinkled in for good measure and tons of tenacity to get the job done.  Now, she says it's easy and has already started a matching necklace. She is a force to be reckoned with, my friend Nat. She approaches life in the very same way.  I have a lot to learn from her and it has nothing to do with beads.
Thank you Nathalie for the beautiful gift of friendship and all the hard work and love you put in that beautiful green beast. I'll treasure it always.


Try as I might I can't do this beautiful bracelet justice. 
My current camera and setup just can't pick up the details and glitter of this baby


Click picture  to zoom


Monday, 24 February 2014

Summer Dreamin'

 Surely this beautiful Highbush Cranberry sleeping under a blanket of snow in my back yard just last week is as anxious for the warm days of summer as I am.


I love this bush in all it's seasons.Right now, it's so pretty with it's red berries. I was admiring the picture this morning when I recalled another picture I took of it last spring.  I remember thinking back then how in the twilight, the blooms made it look like it was covered in snow. So I dug out the picture and that started me dreaming of summer and looking through all the garden pictures and then the seed catalogs. Ah, yes summer will come. It won't be too much longer.
     In the meantime this little beauty has inspired me to make a necklace that will remind of how pretty it looked with its red berries and soft white mantle.  Stay tuned! :)


Thursday, 20 February 2014

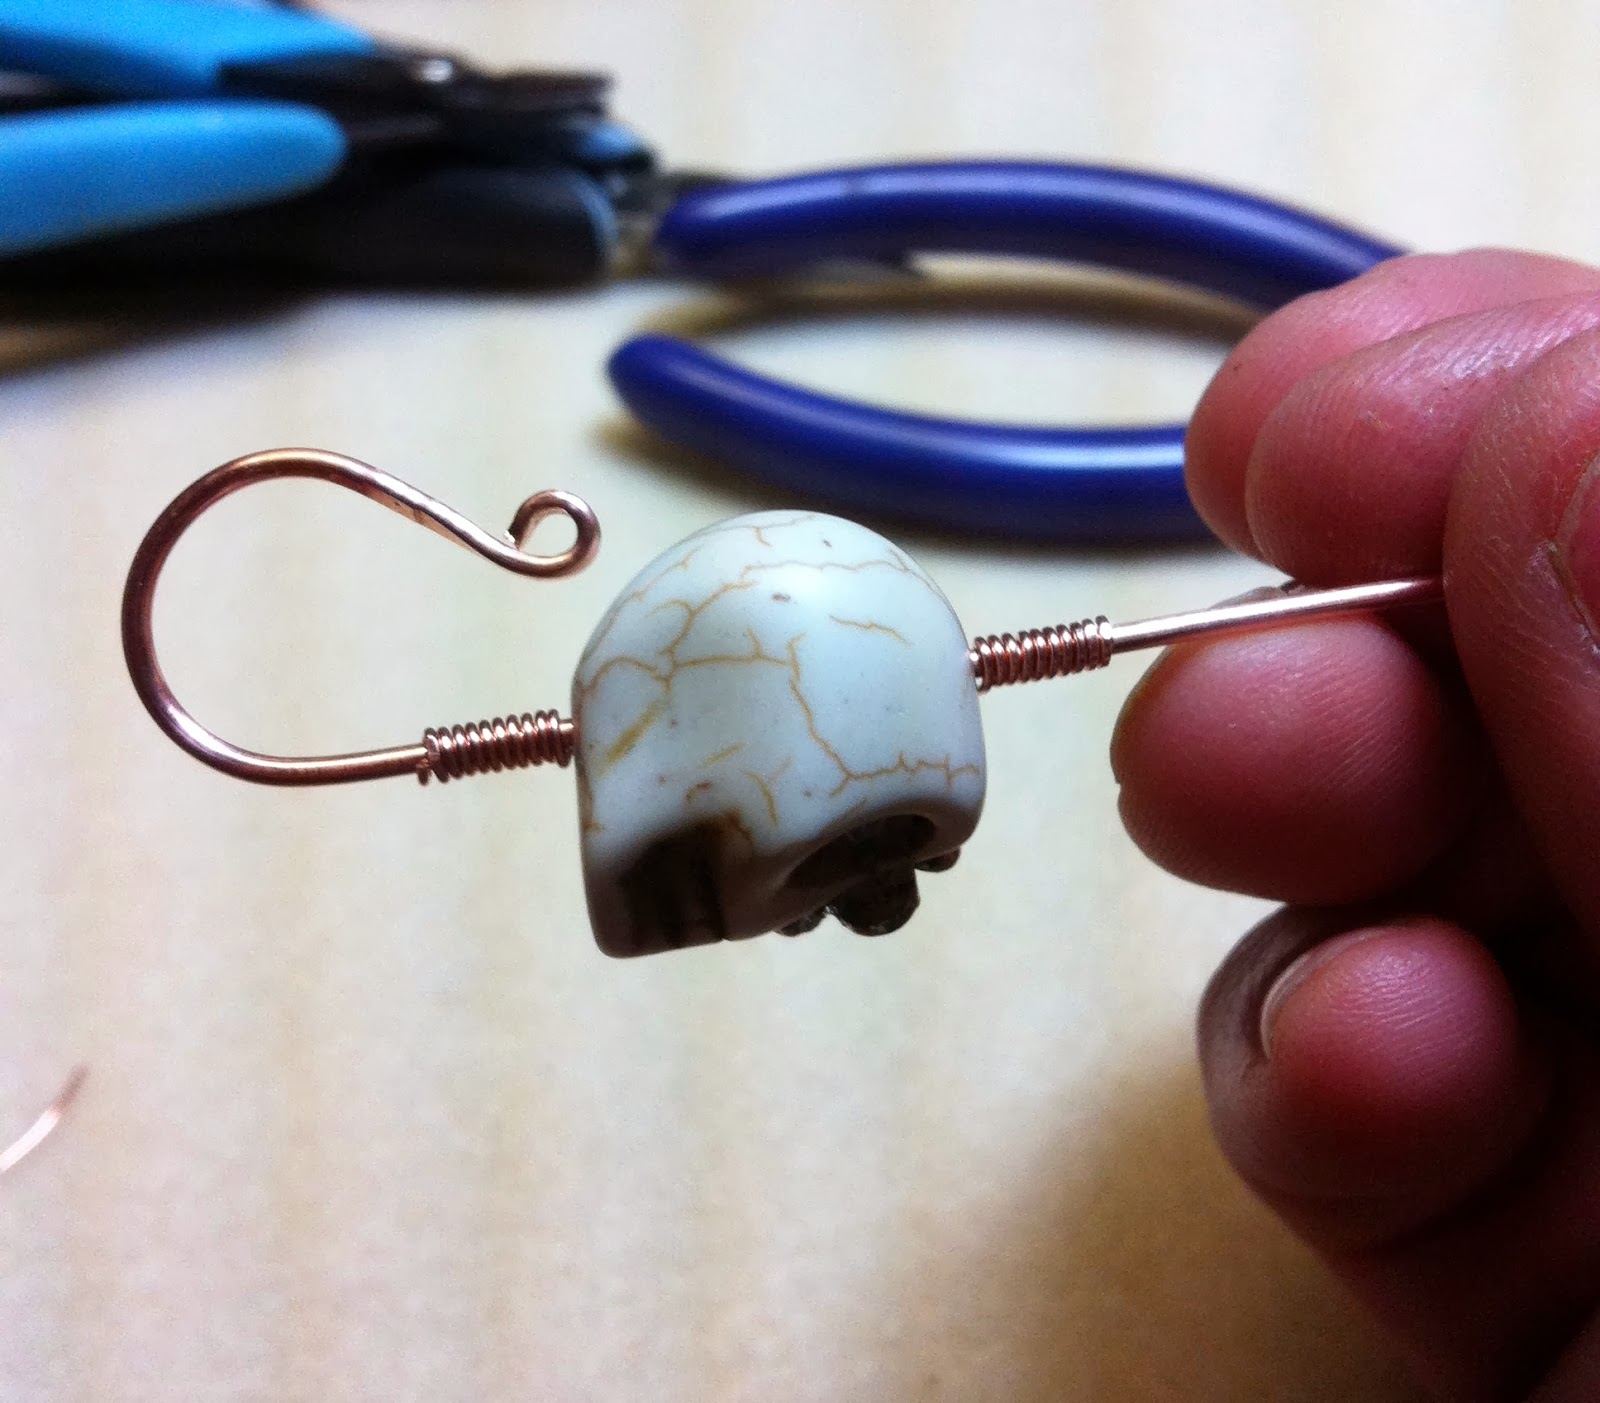
Lampwork Bead Clasp Tutorial


A few people have asked me how to do these.  I've never done a tutorial before so bear with me.

Materials Required:
  • 16 gauge round wire (I used copper)
  • 24 gauge wire
  • lampwork bead (or other type of bead)
Tools Required:
  • Wire cutters
  • Chasing hammer
  • Steel bench block
  • Round nose pliers
  • Chain nose pliers
  • Wire straightening pliers or a cloth
  • Sharpie or dowel 
  • fine sand paper 
Because your bead size varies, so will the length of 16g wire.  It seems that the loop/hook part takes an average of 2" on each side. I was working off the spool (and because my math sucks) I slid the bead on the wire and added 4". Cut the wire. Straighten it with your pliers.

1.  Place the end of your wire on the bench block and hammer .5" on both ends end flat.


2.   Using your round nose pliers make a small loop on each end, facing in opposite directions. 
Hint* Mark your pliers so you make consistent size loops every time.

 3.   Cut a length of 24g to wrap your bead to keep it in place.  I tend to work off the roll or over estimate what I think I might need.  I'd rather waste a little than come up short. For the bead I'm working with (.5") I cut off approx. 10".   Run it through your wire straightening pliers. It'll help to harden it a bit and straighten it out at the same time.

3a.  Leave about a .5" tail to grip and start coiling around the base wire. Make sure the coils are tight and snug against each other. If you end up with a gap you can use your nails or pliers to snug them up. I find I like the longer coils better so 10-12 times around.  Make sure your bead is snug up against your last coil and bring your wire up over the bead and start wrapping in the opposite direction on the other side.  Check your wraps to ensure they are neat and tight against each other and hugging the bead closely.  Now before you give everything a nice tightening, check to make sure your bead is in the middle.  Adjust if necessary . When satisfied with the placement, take your chain nose pliers and gently tighten all the coils and snug up the ends. Be sure to tuck the ends in and check for bits that might stick out and catch on clothes.


4.  Place your Sharpie or dowel just below one of the end loops on the flat side.  Bend the wire around the marker with your other hand as though you were making the top half of an S. Now repeat for the other side. You may have to make some small adjustments to keep it balanced.


5.  Now place one of the curves on the bench block and hammer to flatten the wire.  You can decide if you want it to have a textured or smooth appearance. Both are nice.  Sadly I haven't perfected the art of hammering without leaving any marks, so if I want it smooth, then I sand out any marks after I'm done hammering.


Antiqued with Liver of Sulfur


Hammered and untreated


This little clasp will be great for a
 Dia De los Muertos design


Wednesday, 19 February 2014

The Soup Pot is Simmering

Everything is hush hush until my partner receives her soup. I can't wait to find out who my partner is so I can make the final decisions on what to include in her soup.  So many ideas dancing around in my head.

I can't show anything I've worked on for the BSBP, but I'm happy to say it's already helping me to grow and motivating me to expand my skill set.  I made a bunch of clasps tonight for the first time.  I quite like how most of them turned out, but plan on doing more so I have a good variety to choose from.  Tomorrow I plan on making some etched toggle clasps and torch painting copper hearts.  Lots of copper hearts.  I cut, sanded and textured them already and now they're ready to torch. I'm looking forward to seeing how they turn out.

I read a blog last night from a past BSBP, that mentioned their blog partner was Szarka Carter and that sent me into a mini panic. What if I get Szarka?  She's like a goddess to me and owns the most wonderful online gem and mineral store. How could I possibly come up with a soup that might impress her...or challenge her for that matter? Ah well, I got over it quick enough and I think I'd welcome the challenge now.
Speaking of Szarka, she just got back from Tucson and has some beautiful new stock.  Too bad I'm so poor!
If you like beautiful stones and artisan jewelry, check her out .  That's where I'm headed now!

Szarka's store/ Magpie Gemstones


Monday, 17 February 2014

It's official, I'm in this year's Bead Soup Blog Party!

Woo Hoo!!!  Yup, I'm a little excited about it!  (insert big smiley face here)  The whole reason I decided to start a blog was so I could participate.

So what's this Bead Soup Blog Party, anyway?  It's an awesome, gigantic, international bead swap that pairs you with another jewelry designer. This year there are 490 participants!  You send each other a quality package of beads that includes a focal bead or pendant, some coordinating spacers or beads and a special clasp. It can't be just any old mix. You try and send something a little out of the ordinary. Bead Soup extraordinaire!
The idea is to NOT send what your partner normally creates with.  That little twist challenges you to work with new materials and helps you to grow and think outside the box.  There will be a big Reveal date and LOTS of blog hopping to see what everyone has done.

This event has been covered in 'Jewelry Affaire' and 'BeadWork' magazines and has inspired a book by the creator and host, Lori Anderson.

Here's a link to the book if you'd like a peek'


Bead Soup - 32 Projects Show What Happens When 26 Beaders Swap Their Stash


 Pardon me, I really must go and start getting my Soup ready!