Wednesday, 5 November 2014

How to Make Your Own Texture Hammers

I'm teaching a beginners metal class at our local bead society. They don't have any materials at all. I needed at least 10 textured hammers. Anyone that has priced these types of hammers knows that they can range from $30 for a low end hammer to $70 for a Fretz. (the Cadillac of hammers in my books) I couldn't afford nor justify the cost of that many hammers. 
My Mom used to always say, "Necessity is the mother of invention and my wonderful sister added to that recently with, "You are the Daughter." I loved that!
So I did the only thing I could think of. I shopped around and
 bought a bunch of inexpensive hammers. I found some 8 oz.ones on sale at Canadian Tire  and 10 oz. ones at Home Depot. I bought both. 

Try as I might I couldn't find any ball peen hammers anywhere that would be light enough for what I wanted. They would have been my first choice.
These are the hammers I bought.


I received quite a few requests for a tutorial and orders so I"ll share with you the tools I used and some of the process. Please understand that I am not an expert . There are quite possibly better ways to accomplish this. I don't have the benefit of experience or formal training. This isn't so much a tutorial as a walk-through of what I did.
 I muddled my way through and found what worked best for me. My hope is to provide a bit of guidance and perhaps encouragement for others to do the same. One thing I love about working with metals is the process and finding out what happens when I...
I'm a firm believer that there is always more than one way to get a job done. I am often confined by limited knowledge or skills and a lack of proper tools but I am armed with determination and of course my trusty Dremel and flexshaft attachment. 


Tools & Materials Required:
  • Dremel or Flex shaft 
  • Vise
  • Fine tip Sharpie
  • Cut off wheels 
  • Various grinding stones or sandpaper
  • Diamond ball bit
  • Diamond wheel point, knife edge bit
  • Polishing bits 
To be honest I made do with what I had and hoped for the best. 
Please remember to always use safety glasses and a mask when working.

First I decided what pattern to apply and marked the hammer with a Fine tip Sharpie.
Put the hammer into the vise. The pattern you choose will help you decide which grinding wheel or bit will suit your needs. For the smaller lines/stars I used the thinnest wheel I had. Be warned these things snap very easily. It seems if you look at them the wrong way they fly apart.


Notice the sharp edge. That will need to come off. 


Close up of the cut off wheels used for the pattern above


This bit also makes nice tiny lines 

Be careful that your cutting and grinding doesn't wear down one side of the face more than the other.  Once I finished the pattern and was happy with it. I used a grindstone to take off the sharp edges all around the face and top to remove any burs.  I used varying degrees of stone from coarse to fine. This could  be done with sandpaper too.
(I mostly applied what I know about metal work and jewelry to accomplish my goal.)  For the dimpled hammer, I used a diamond round ball bit. I placed the dimples randomly. To make the larger dimples I rotated the bit in every direction, slowly enlarging it. For the smaller dimples I kept it straight up with very little play. 

This is an opportunity to play and see what gives you the look you want. I discovered if I didn't like something I could grind it out and start over.
I used these for shaping and for grinding away the sharp edges in progressively finer gritsAny scratches or marks left on the hammer face will transfer to the metal you're texturing. The more you polish your hammer, the more it will burnish your piece as you work.

Once I was satisfied with the overall look and had sanded out the burs and scratches I moved onto the polishing. 
I used the rubber polishing bit then the nylon bristle brush to clean up the grooves. They were what I had on hand.  In the future I would use the 3M Radial Bristle Brushes in varying grits. I've heard great things about them.
Rubber Polishing Bit
Nylon Bristle Brush


 From the very beginning I was too intimidated to try to cut off the claws. I thought I didn't have the proper tools to do it. I asked my husband,  but he didn't think he had anything either.  It was nagging at  me all the way through, that I only had the one side of the hammer to work with.
It was only when I was finishing my 12th hammer that I decided to bite the bullet and see what would happen if I tried to cut the claw off.   So I took out the heaviest cutting disk I had and my last hammer.  It went through those claws within minutes.  It was awesome! I was thrilled with the results and pulled all the other hammers back out to finish it up right. :)
Be warned though; sparks will fly like a Canada day sparkler!  The sparks didn't burn and once I got past my initial trepidation it was lots of fun.
Fiberglass Reinforced cut off  disk 
or as I called it, "Big Daddy" 


A short video demonstrating how the sparks can fly, so you know what to expect. ( not on the technique itself)

 This was a great fun project and for the price of one mid-range hammer I now have 13 new hammers to add to my repertoire. They're not Fretz but they'll do me just fine. I encourage anyone that works with metals to try it. You'll be glad you did.  


List of materials :
(with links)
Diamond bits
Fiberglass Reinforced Cut off Wheels 
Carborundum Cutting Wheels
Rubber Polishing Bits


Quite a few people have commented on their confusion about what the different bits are used for. I found lots of good info here
All Things Dremel (Lots of info regarding the various bits and accessories)


If you prefer to order your hammer instead of making it, please leave me a message. Thank you!


Friday, 9 May 2014

Bead soup Blog Party~ The Big Reveal

The 8th Bead Soup Blog Party shows you what happens when jewelry designers swap their stash.

Thank you LORI ANDERSON for hosting this blog party! This is the first time that I participate in the Bead Soup Blog Party. I've loved it every inch of the way!
Participants from all over the world were paired up and they sent each other "soup ingredients"~any beads, findings, elements they chose. The only mandatory items were a focal and an art clasp.
Once you receive your "soup" you let things simmer and unfold on the Reveal Date.
This is the day I've been waiting for!

 This party is designed to challenge you and help you to grow as a designer and maker.  From the word "Go" that's exactly what it has done for me.  From the selection of beads and the making of the pieces I wanted to include in my partner's soup.  Whenever I do a swap I always worry whether my partner will like what I send.  People have such varied tastes and styles, it can sometimes be a little intimidating. 


My partner is Regina Santerre of Regina's Writings and she gracefully gifted me with beautiful ingredients.
Here's a reminder of the amazing soup she sent to me.


As I mentioned in a past post there is a process I go through when I make something.  For some reason I got hung up on the idea that I needed to 'string' a necklace and try and use all the components in one piece.  Stringing is not my forte and I really wanted to do justice to that pendant.  Another handicap I have is I can't draw or envision what something will look like until I actually do a mock up. Strange, I know.  If I do have a vision I rarely end up with that as my end result.  I don't usually mind this because my biggest pleasure comes from the process itself. The only drawback to that is that it takes me a little longer sometimes to decide on my final design. So after a few false starts this is what I came up with.  It's a little out of my comfort zone but thank you Regina for making me think outside my own design box.

I had really wanted to use the clasp as a bail but it covered a little more of the dragonfly than I wanted so I switched that idea for a little button I had in my stash.


I really liked the clasp Regina sent me and wanted to highlight it, so instead of using it on the dragonfly necklace and hiding it in the back, I used it as a focal on another little beaded necklace.


Once I finished the main piece I was able to relax and play a little in my own comfort zone and this is what happened.


I used copper tubing to make a channel/anti-clastic  bracelet.  As much as I enjoy using pearls in unexpected ways something felt a little off with this bracelet. 
When I got word that the party was postponed I decided to see if I could give it a makeover.


 I think this works a little better.  What do you think?


I still have a work in progress to use the rest of those lovely pearls, and Vintaj links, but I ran out of time, so I'll post that as soon as it's finished.

This whole experience was a lot of fun and has really challenged me and taught me quite a bit.  I'm so grateful I had the opportunity to participate.  I can't wait to see what Regina and everyone else have come up with! Thanks for stopping by.  Please remember to stop by Regina's blog to see how she used the soup I sent her.

If you'd like to leave a comment, I'd love to hear from you.  It's super easy, no need to register or use those annoying little Capchas.

Happy Blog Hopping, everyone!


For a list of all the participants you can go to the link below.  It's right at the end of our hostess' Lori Anderson's Soup Reveal


Sunday, 4 May 2014

Bead Soup Blog Party Postponed

If you are looking for the Bead Soup Blog Party reveal post, it has been postponed by one week to Saturday, May 10th 
Sending, our hostess  Lori Anderson of Pretty Things lots of positive energy and healing vibes. 

To be honest I'm actually sighing with a little relief here, I could use the extra time to get my projects and pictures finished.  I was finally successful in carving out a work space.  So, now I just hope I can do justice to my partner,Regina's mix she sent me.  If you'd like to see the soup I sent her you can check it out here.

Stay tuned!  


Sunday, 27 April 2014

Life Happens and Sometimes it's Messy, Messy, Messy

I'm in full panic mode tonight.  There's been a series of "life happens" events that have kept me hopping for the last couple of months. Up until today I had been feeling pretty good about my 'soup' so far.   I absolutely loved the process of deciding upon and making my partner Regina's soup.
I learned so, so much from that side of the exercise and had lots of fun in the process.  I was pleasantly surprised at the lessons and the process surrounding this side of the soup mixing.

Then my soup arrived and I was loving it and ideas were bouncing all over the place!  I seem to have a set of stages I go through before I actually sit down to create something.  Phase 1 is when I go through my ruminating stage where I just let ideas flow in and out as they will.  I don't try and direct it. I probably couldn't if I tried.  I just let it take it's course.  I told my husband it's like having Creative A.D.D.   Most people would probably call it brainstorming but because I don't actively try and direct it I call it A.D.D.    There's no real telling how long this stage will actually last.  It can range from a few hours to a few days, sometimes more.  I'll even dream about the possibilities.  Did I mention I might be a tad OCD?  Sometimes I have to rein it in and just sit and pick one to start.  I was finding this project challenging because I don't do much stringing and for some reason I got locked on the idea that was what I needed to do. So I sat down and concentrated on giving  my ideas a little more focus
I knew time was creeping by and didn't want to get caught at the last moment so I settled on a few design ideas and put a couple of them together to see how well they'd work without actually constructing them because of other pressing things that needed my attention.  The day before I left to go visit my Mom for her 89th birthday I had narrowed my ideas down to a couple of designs and got them ready to assemble when I got back.  I was still feeling fairly confident and enjoying the process thoroughly even though I knew I'd be gone 10 days.  The plan was to get down to brass tacks and put it all together once I got back.  The designs were fairly well set and all that was left was the mechanics. I was excited and looking forward to it. I got home today,  BUT...  this is what I came home to.


This is the main door to my Jewelry Room, all sealed shut to try and minimize the dust that's going to soon permeate what will feel like every corner of the house.


Door 2: A different kind of barrier but almost as effective.

We've been waiting for a while now to have this work done and unfortunately the contractor called at the last minute and wanted to start work the next day.  So Claude made an executive decision and piled everything from the first room where the work is starting into the jewelry room.  There weren't a lot of other choices.   Once the first room is done then we'll have to move everything from the jewelry room into the first room so they can finish my room too.  Phew, I get tired just thinking about it.


A curio cabinet, full length mirror, tall dresser, bookcase, and 3 wardrobes along with the normal     
                                               workroom furniture make it a tad cluttered.


Yes, my soup is buried in there somewhere.
                     
That's what has me worried.  I'm hoping things will look better in the light of a new day and that I'll find everything I need to get cooking tomorrow morning and find a way to carve out a small workspace somewhere. Wish me luck!


Oh.  One more, before I head to slumber land.  This is the progress on the other room.


Not one little bit of insulation in that wall!  No wonder heating is costing a small fortune.

Sweet dreams all.  Wish me luck for the morning.


Monday, 31 March 2014

Bead Soup Has Arrived

What could possibly be better than sitting by the ocean listening to the waves wash away any cares I might have?  Well to be doing that, and writing about something else I love...beads.

I received my soup from my partner Regina Santerre of Regina's Writings a couple of weeks ago and it killed me that I couldn't take the time to post about it.  What a yummy mix! (Click on the link if you'd like to check out her blog and maybe get a peak at what I sent her.)

I absolutely love the colors and warm metals she picked out for me. Copper and brass are real favorites of mine...and Red, who doesn't love red? The day it arrived I had dragonflies on my mind.  I was trying to come up with how to make one in copper.  Imagine my surprise and delight when I opened my package to find a lovely handmade clay dragonfly pendant by Golem Design Studios!
I immediately got sidetracked from what I was doing and started to play a little, thinking of what I was going to come up with. I'm not quite sure yet , but I think I have a plan for that sweet little clasp that's a little different from the norm. Wish me luck!  This is going to be quite a challenge for me and so much fun in the process.

Tomorrow it's supposed to rain so I'm going to take a little break from soaking up the ocean's energy and check out a fabulous local bead store here in Virginia Beach to see if I can find something equally amazing to complement my soup. Have a great week!

Eye Candy Soup

Golem Design Studio

Vintaj Natural Brass Waterlily links and tiny little brass spacer beads


Friday, 7 March 2014

Week in Review

I haven't been writing because I've been busy making.  This week held some fails, some challenges, lessons learned and some really neat explorations.

I finally got to try torch painting...AWESOME!!!  I love it and the colors you can get.  I won't be including any pictures because they may go in my bead soup Just in case, Mum's the word.  It's definitely a lot of fun and will be a frequent activity I suspect.
The biggest challenge I had this week is a piece I absolutely love and still haven't finished.  I'm at a stuck point.  Again, I can't show it either because I really hope I solve the issue so I can send it to my partner.  I really love it and it was lots of fun and easy enough to do until I got stuck.  The last step has been attempted and failed for three nights in a row!  So I'm getting lots of experience in what doesn't work. LOL  Once I get it, I'm definitely going to make a few more. I love it that much!
I took a much needed break from it all and spent today with a childhood friend who's recently discovered the joys of jewelry making.  We drank tea, and I showed her how to do a bit of wire weaving and Viking knit. She was glad to learn a couple of new techniques and was looking forward to putting them into practice. Bonus! It's so nice that we can share this passion, it's added another dimension to our relationship that I quite enjoy.
We decided to hit a few bead stores and stopped for lunch on the way and ran into my hubby and grandson at the restaurant. What are the chances of that?  The four of us visited and laughed over a lingering lunch, then Sue and I went to indulge in all things beady. Yay for bead therapy and good friends!
We capped the day off with a nice dinner at the local pub.  I had a really nice day that restored my determination to work on my project again tonight.  Alas, still no success.  Maybe next time.

Tomorrow will be spent with another dear friend at the garden show in Toronto so that should be another great day.  I love my garden and I treasure my times with Cindy.  We share three passions; good books, gardening and 'crafts'. I enjoy her creativity and verve, her energy is contagious.  On that note, I best consider slumber at this point, so I can fully enjoy our time tomorrow.
Have a great weekend!


“To plant a garden is to believe in tomorrow.”

Tuesday, 4 March 2014

Partnered Up!

I managed to fall prey to a cold bug and haven't had a clear enough head to write the last couple of days but I was happy to see I've been paired with my Bead Soup partner. 
My partner, Regina, is in Florida, where I truly wish I was right about now; as I watch yet more snow falling endlessly from the gray sky.

Here's a link to her blog:    Regina's Writings

As Lori Anderson (the organizer) wrote on her blog "It's quite the task to get all the participants matched up.  "We have 30 countries, 48 states (come on, Colorado and North Dakota!) -- North America, Asia, Europe, Australia as continents.  THIS ROCKS!"  I agree,Lori, this does rock and so do you!

If you'd like to read more about how she matches people up please hop on over to her blog to get a feel for the process.  She is nothing short of amazing as she is doing this while fighting a very serious illness.  Thank you Lori for all you do.

Lori Anderson's Bead Soup Blog Party

Wednesday, 26 February 2014

A Challenge is Born

My wonderful long time friend Sue shared a bunch of beads with me a couple of months ago that she didn't really know what to do with. Some presented a challenge and some were, well... fugly.
Those that I didn't think I could really put to good use I asked her if I could share. 
When Nathalie came over the other day, we naturally migrated to the jewelry room. I gave her the box to go through and see if there was anything she could use.  She dug out some with glee and others with that look of hers and says, "What the heck would you do with these?"  She pulled out some of the fuglies.  We laughed and brainstormed and pretty much came up with a couple of old "mamere' ideas.  Being a couple of girls originally from la belle province that's our term for grandmother or old woman or more eloquently 'old biddy'.  We started to tickle our imagination a little further and actually started to get some half decent ideas and decided we needed to have a challenge.  There aren't too many rules.  We have one month to use the beads in any design we come up with that's not too matronly. That's it.  We started to get a little excited and hummed and hawed and all of a sudden there was no more sharing of ideas.  I have a few things that need to get finished before I can really play with them. I wouldn't have touched these things to be honest, but now that the gauntlet has been laid, I'm chomping at the bit to get started with them.  Sue doesn't know it yet, but we volunteered her to join this challenge since she was the one that started it all to begin with.


The Fuglies


Beady Friends and Their Lessons

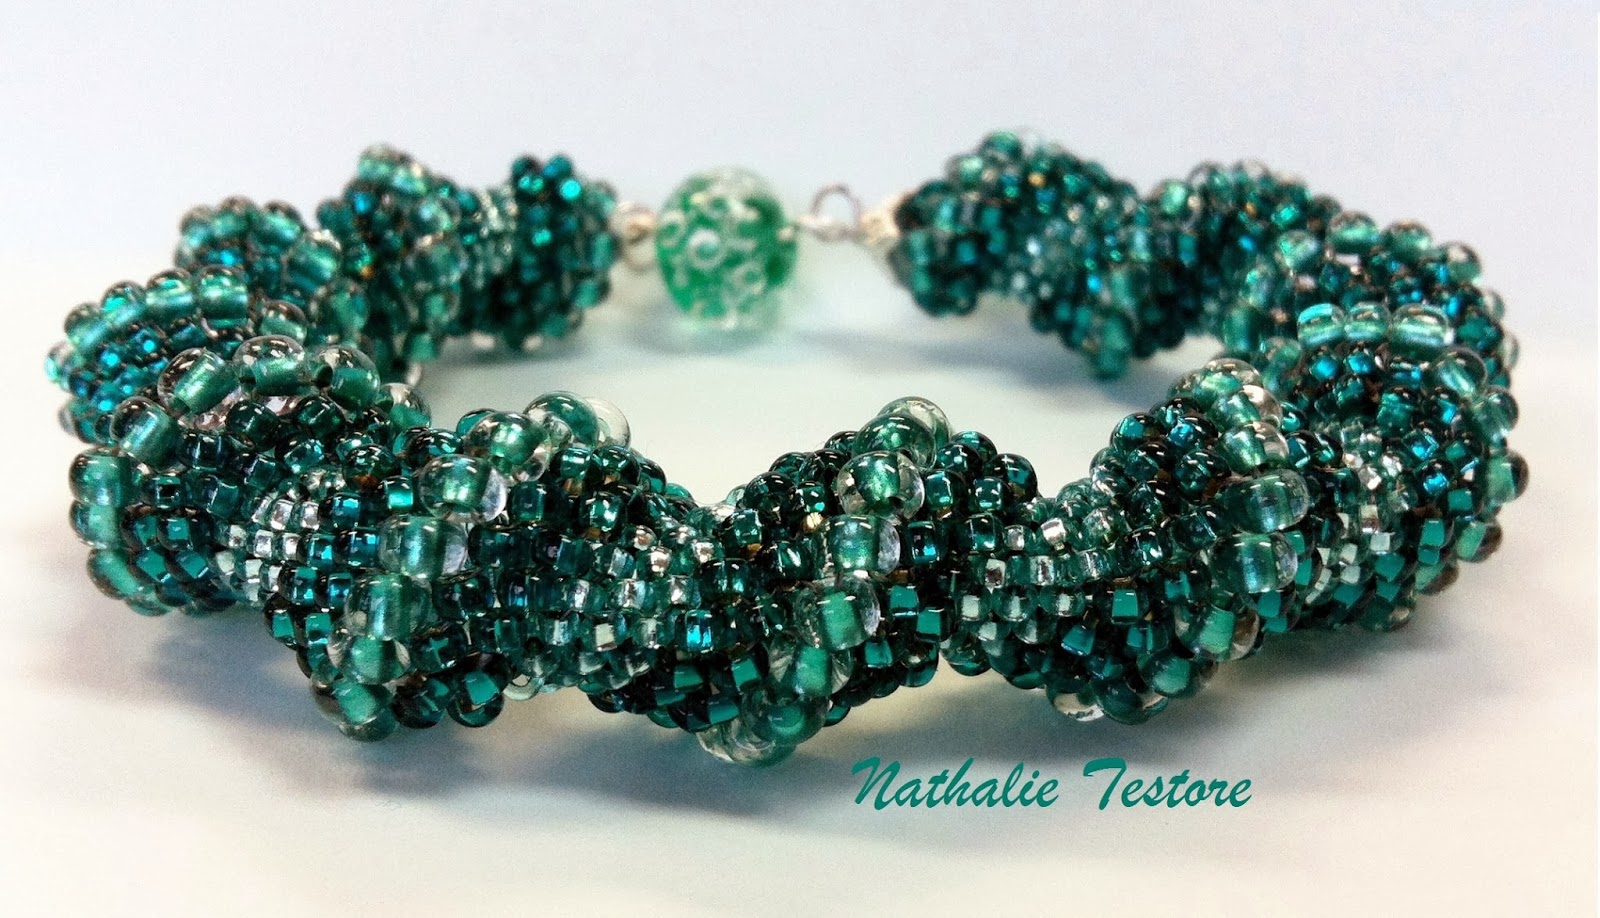
Yesterday my friend Nathalie came over for a visit.  It's always great to see her and we always have a good time, especially if we end up in the jewelry room.  We teach each other things or just explore or snoop through my stash for inspiration.  However yesterday was special because I hadn't seen her since December and she came bearing a gift, a beady gift! A gift packed with meaning and love.

Let me give you some background before I show it off. It was nearing the end of summer when I casually asked Nathalie if she knew how or could figure out how to do a Cellini Spiral bracelet for me. Nathalie's fairly new to this art form and if I'd known the task was going to be that challenging I would never have asked.  But asked I did and she tried, and it didn't work for her.  She started and pulled it apart multiple times. She'd put it away for awhile when it got too testy.  Then a move and a new job took over for awhile, but still, the Cellini was never far from her mind and she'd take it back out and try and figure it out.  We scoured the net for a better tutorial and she asked some of "the masters" for help and it just didn't want to work for her. I felt terrible for asking her.  I offered to buy her a tutorial in hopes it would present it in a different way that would click. I offered a class at our local beady hangout but she was determined to figure it out on her own.
Well one night a few short weeks ago she had her Eureka moment and I received a middle of the night message.  Four little words, that was all  "I beat the beast!!!" 
It only took 7 months, a big move, a career change, lots of life surprises sprinkled in for good measure and tons of tenacity to get the job done.  Now, she says it's easy and has already started a matching necklace. She is a force to be reckoned with, my friend Nat. She approaches life in the very same way.  I have a lot to learn from her and it has nothing to do with beads.
Thank you Nathalie for the beautiful gift of friendship and all the hard work and love you put in that beautiful green beast. I'll treasure it always.


Try as I might I can't do this beautiful bracelet justice. 
My current camera and setup just can't pick up the details and glitter of this baby


Click picture  to zoom


Monday, 24 February 2014

Summer Dreamin'

 Surely this beautiful Highbush Cranberry sleeping under a blanket of snow in my back yard just last week is as anxious for the warm days of summer as I am.


I love this bush in all it's seasons.Right now, it's so pretty with it's red berries. I was admiring the picture this morning when I recalled another picture I took of it last spring.  I remember thinking back then how in the twilight, the blooms made it look like it was covered in snow. So I dug out the picture and that started me dreaming of summer and looking through all the garden pictures and then the seed catalogs. Ah, yes summer will come. It won't be too much longer.
     In the meantime this little beauty has inspired me to make a necklace that will remind of how pretty it looked with its red berries and soft white mantle.  Stay tuned! :)


Thursday, 20 February 2014

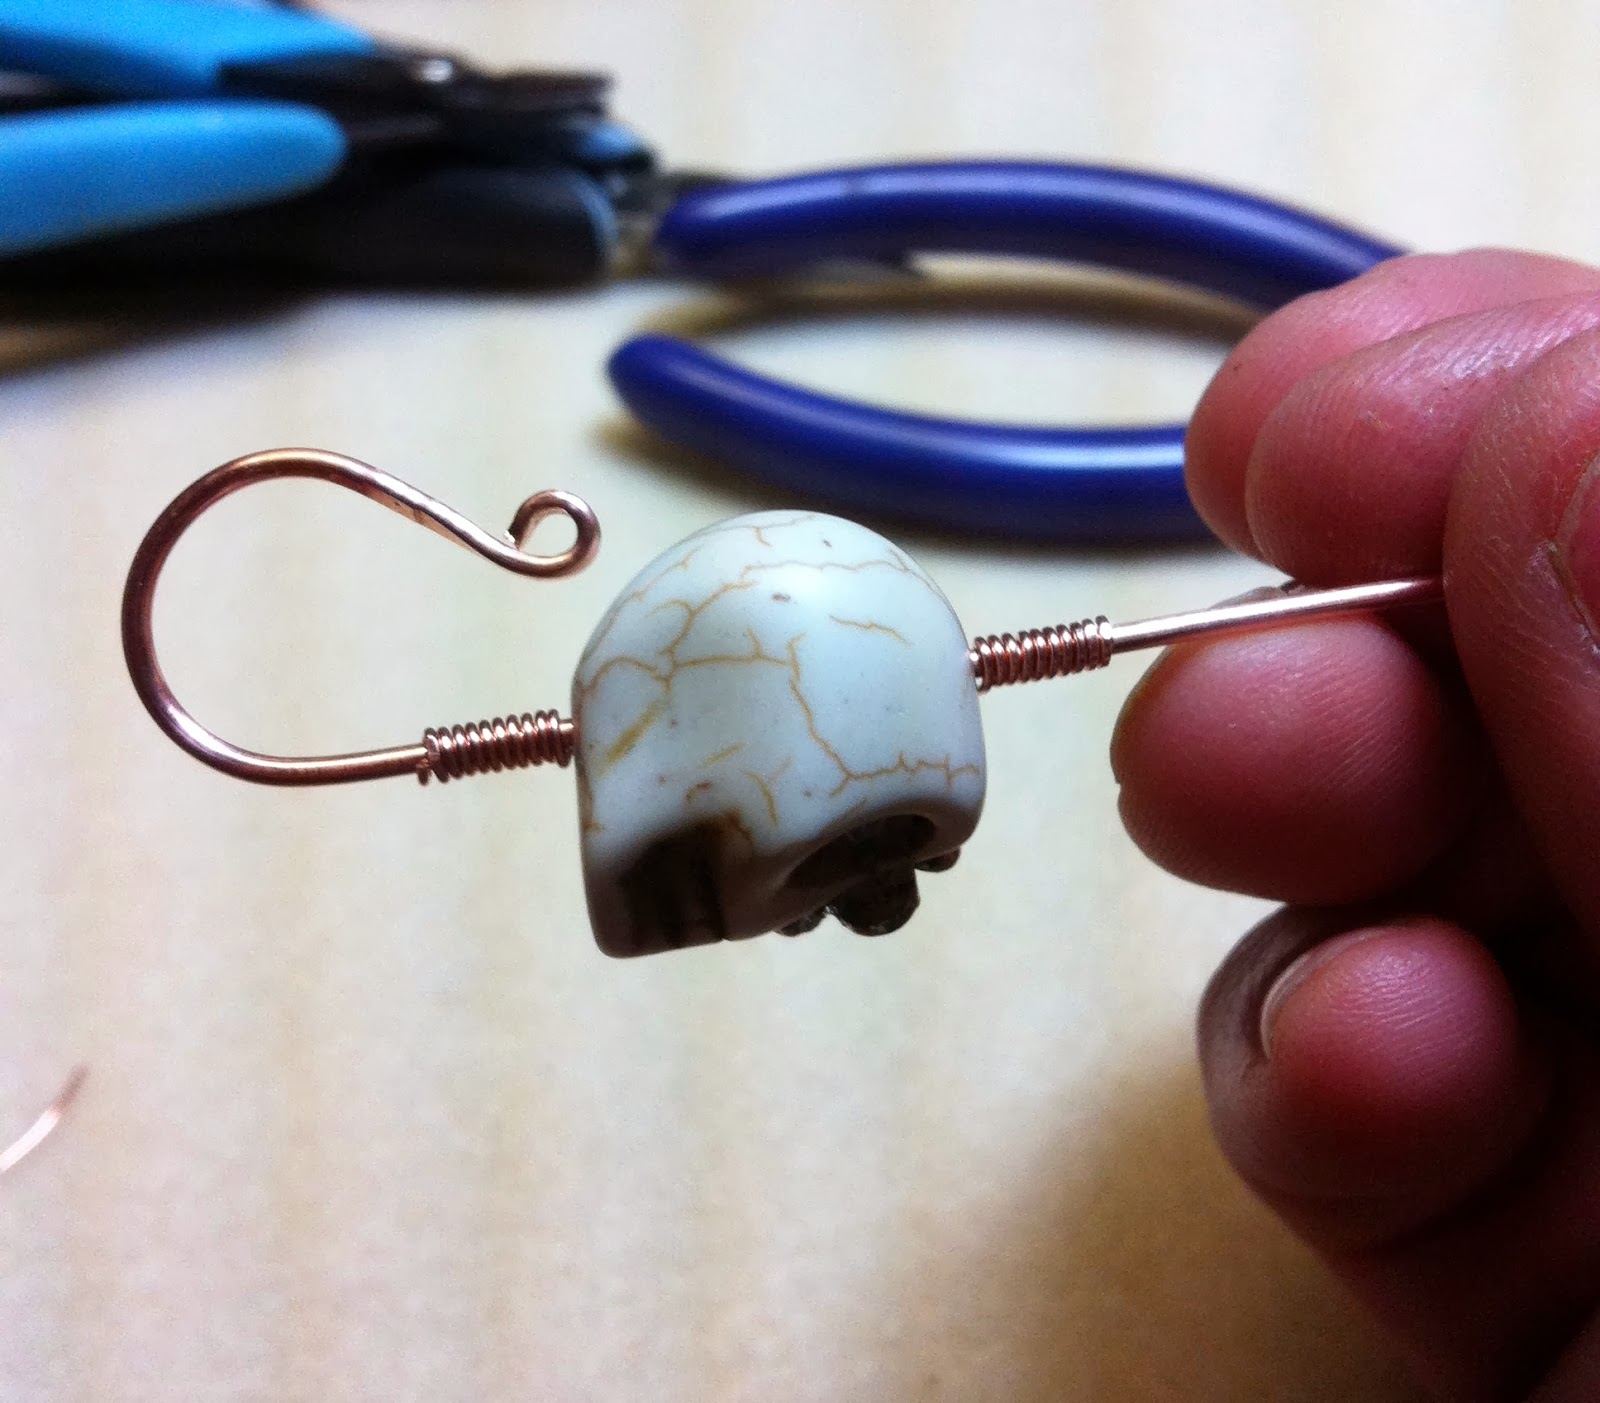
Lampwork Bead Clasp Tutorial


A few people have asked me how to do these.  I've never done a tutorial before so bear with me.

Materials Required:
  • 16 gauge round wire (I used copper)
  • 24 gauge wire
  • lampwork bead (or other type of bead)
Tools Required:
  • Wire cutters
  • Chasing hammer
  • Steel bench block
  • Round nose pliers
  • Chain nose pliers
  • Wire straightening pliers or a cloth
  • Sharpie or dowel 
  • fine sand paper 
Because your bead size varies, so will the length of 16g wire.  It seems that the loop/hook part takes an average of 2" on each side. I was working off the spool (and because my math sucks) I slid the bead on the wire and added 4". Cut the wire. Straighten it with your pliers.

1.  Place the end of your wire on the bench block and hammer .5" on both ends end flat.


2.   Using your round nose pliers make a small loop on each end, facing in opposite directions. 
Hint* Mark your pliers so you make consistent size loops every time.

 3.   Cut a length of 24g to wrap your bead to keep it in place.  I tend to work off the roll or over estimate what I think I might need.  I'd rather waste a little than come up short. For the bead I'm working with (.5") I cut off approx. 10".   Run it through your wire straightening pliers. It'll help to harden it a bit and straighten it out at the same time.

3a.  Leave about a .5" tail to grip and start coiling around the base wire. Make sure the coils are tight and snug against each other. If you end up with a gap you can use your nails or pliers to snug them up. I find I like the longer coils better so 10-12 times around.  Make sure your bead is snug up against your last coil and bring your wire up over the bead and start wrapping in the opposite direction on the other side.  Check your wraps to ensure they are neat and tight against each other and hugging the bead closely.  Now before you give everything a nice tightening, check to make sure your bead is in the middle.  Adjust if necessary . When satisfied with the placement, take your chain nose pliers and gently tighten all the coils and snug up the ends. Be sure to tuck the ends in and check for bits that might stick out and catch on clothes.


4.  Place your Sharpie or dowel just below one of the end loops on the flat side.  Bend the wire around the marker with your other hand as though you were making the top half of an S. Now repeat for the other side. You may have to make some small adjustments to keep it balanced.


5.  Now place one of the curves on the bench block and hammer to flatten the wire.  You can decide if you want it to have a textured or smooth appearance. Both are nice.  Sadly I haven't perfected the art of hammering without leaving any marks, so if I want it smooth, then I sand out any marks after I'm done hammering.


Antiqued with Liver of Sulfur


Hammered and untreated


This little clasp will be great for a
 Dia De los Muertos design